

It’s been a minute since I last did a DIY, hasn’t it? Yeah let’s change that.
It’s no secret to literally anyone who knows me that I look up to Kelly Wearstler heavy. She’s cool as fuck and she has some of the best taste I’ve ever seen. So here I am, scrolling through her Instagram a couple of months ago, and I come across this piece of art in a picture she posted.

The post wasn’t even about the piece of art, but I fixated on it. It’s so simple yet so cool… But probably WAY out of my price range.
So what do you do when you can’t afford to buy something? Just make that shit yourself. And that’s what I set out to do.
the strategy
When you look at the piece of art, it looks super simple. Just stick something behind a canvas and you’re good, you’d think. But in order to make whatever the object you put behind the canvas stick out, you have to be able to uniformly and securely apply pressure.
So not quite as simple as I thought. But I had an idea…
Once I had my plan, then I just needed to get my supplies. Which included figuring out what the hell kinda object I can get that will pop through with a similar texture…
supplies
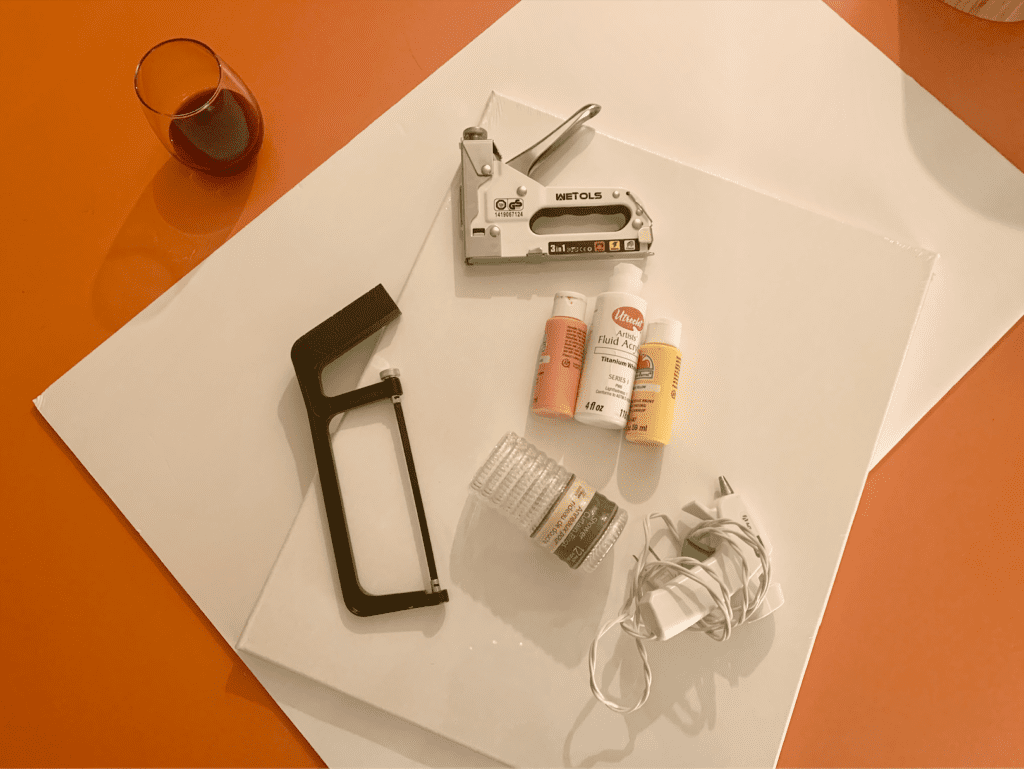
You’re going to need:
- a canvas in the size of your choice
- a staple gun
- hot glue gun
- shower rings
- scissors or x-acto knife
- posterboard and/or heavy-duty cardboard
- optional: paint in a color of your choice
Here’s a high level overview of what we’re gonna do: attach the shower rings to the board, shove the board behind the canvas with texture side up, then staple gun something behind to keep the texture pressed against the canvas. Sounds pretty simple, right? Well… I’ll walk you through and tell you where/how to avoid the mistakes I made.
step 1: measure and cut your board

Take a measurement of the inside of the back of your canvas. This is the spot where you will be inserting your posterboard into once the rings are attached.
When you’re cutting your board, you’ll want to make sure your cuts are precise. You want to make sure that it’s small enough to fit fully within the space but large enough where it fits snugly so that it can help to add some pressure. So basically, it has to be the exact dimensions of that indentation.
Once you cut it, pop it in the space to ensure that it fits tightly.
step 2: cut your shower rings in half
You want your shower rings to be in half-circle shapes so that the bottom can rest securely on your poster board. So you’ll just want to saw them in half with the hacksaw.
This goes without saying, but especially if this is your first time using a hacksaw, be very careful. If you can get someone else to help you hold the shower ring in place securely while you make your cut, that’s even better.
But you may just get lucky, like me, and realize that the plastic the shower rings are made of is so shitty that you can just rip them in half. It may not be possible depending on which rings you’re using, but give it a try. It makes it so much easier and so much safer.
Try your best to break all pieces to an even length.
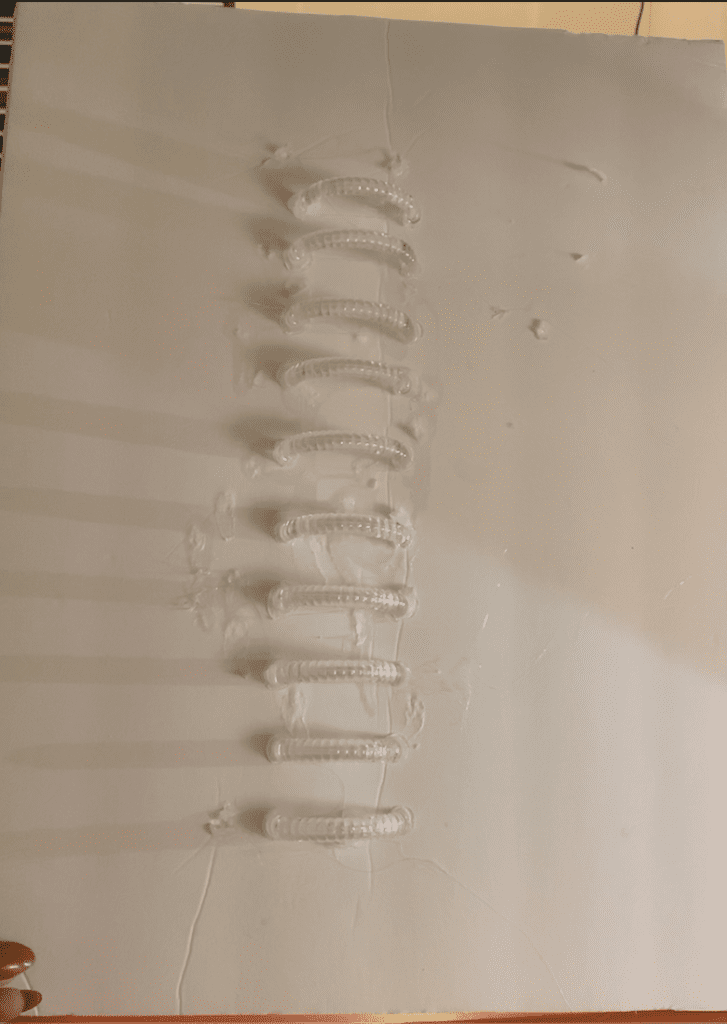
step 3: glue the shower rings down
Next, you want to use your hot glue gun to secure your half-circle shower rings to your poster board. Glue them down with the cut (or ripped) edges down and the circular part up. Doesn’t matter if you have pencil marks or hot glue strings all over the place. (Like I have) You won’t be able to see it when we’re done.
This is the part where I got a headache so that you don’t have to.
I tried to be creative and do a winding pattern with the ring so that it looked a little more interesting. This is not the move. It makes it way too difficult for all of the arches to show through. The key is to arrange all pieces evenly spaced in a straight line. And if you have slightly varying lengths to your pieces, try to arrange them in ascending height so that the height is more consistent as you jump from piece to piece.
Although it would make it a lot cooler if we could take a little more creative liberty with the arrangement, it’s definitely not worth being able to see the pattern through the canvas.
Check out the IGTV below for a little clarification about how this problem looked and what to avoid.
step 4: cut out your backing
Since the shower rings are (intentionally) taller than the width of the canvas, you’re gonna need to apply some pressure to keep them taught against the canvas. Grab either another piece of poster board or a piece of sturdy cardboard and cut it to the dimensions of your canvas. You’ll be securing this to the back.
step 5: secure the board to the canvas
This is the satisfying part.
Add a little bit of hot glue to the arches of all of your half shower rings. This will help them to adhere to the canvas and make the texture pop. Now, quickly before the hot glue dries, you pop the poster board, texture side up, into the back of the canvas. You should be able see the figure popping through. Then place the board you cut in the previous step behind the posterboard and apply pressure.
Now it gets a little awkward. Your board is going to want to keep pushing back from the canvas since there are obstructions in the way. Just keep firmly and evenly applying pressure as you staple gun the board to the back around the whole perimeter of the canvas.
Some tips as you do this:
- Press the areas around the space you’re stapling firmly to the wood on the back of the canvas to ensure that the staple will reach down all the way. If you don’t do this, there’s the possibility of the staple only puncturing your board and not connecting it to anything.
- Since your shower rings might buckle under too much pressure, when you’re stapling the back and the canvas is face down, place your foot or some other slightly elevated object between the corner of the canvas and the floor. This will give you a sturdier base to staple and will protect your shower rings from buckling.
step 6: add some paint (optional)
If you’re satisfied with the way that your piece looks now, great! This next step is totally optional. But if you want to add a little something extra, throw a paint color of your choice on the canvas. I chose to do a peachy-cream color in an abstract shape all around the spiny texture.

And there you have it! Your very own Kelly Wearstler-esque DIY.
Tune into the IGTV below for a video tutorial. If you try this out yourself, make sure you tag me, I’d love to see your interpretation!

keep it homey, homies
About me
Hey my name’s Hannah Michelle Lambert, the voice behind homey homies. I’m an LA-based designer, writer, and content strategist. I’m passionate about the intersection of productivity and creativity. I love talking about creative habits, technology, processes, and everything in between that helps me blend the Type A and Type B parts of my brain.


Leave a Comment