
It seems like everyone caught the sewing bug the last couple of years. It’s a fun hobby, it makes staying fashion-forward sustainable, and it’s honestly a flex. But it can be intimidating starting out. So that’s why I put together this sewing starter kit for you.
I’m laying it all out for you. Not just the tools you’ll need, but tips on getting started and some suggested first projects. This is your ultimate resource for getting your sewing start.
For some background, I’ve been sewing since I was probably 11 or 12. Mostly making pillowcases and skirts, the easy stuff. And I dabbled a little throughout high school and college. But in the last two years, I really have been investing my time in perfecting my craft.
And I’ve been having a ball letting my creativity run free:


But along the way, I picked up some tips and tricks. And I accumulated a lot of supplies along the way. So I can definitively say exactly what you need to start sewing. This sewing starter kit may not cover more advanced sewing needs, but it will be more than enough to get you started.
Table of contents
1. Sewing supplies
2. How to start sewing
3. Best tips for getting started sewing
4. Sewing inspiration
Sewing supplies you need to get started
Below is everything you need in your sewing starter kit to get you going. I’ve linked almost everything through Amazon in the post, so I made it really easy for you to just add it to cart and get going.
1. Sewing machine

Of course, you’ll need a machine to start sewing seriously. Hand sewing is fun, but it will take you forever to sew a whole outfit with just a needle and thread.
There are a million sewing machines out there though. So it can be tough to know which one is best for you.
If you’re just trying sewing on for size and aren’t sure if you want to make the full investment, I would recommend seeing if you can get a secondhand machine. You can look online on places like Facebook Marketplace or OfferUp. But try asking friends and family members, too. You’d be surprised how many older relatives may have a sewing machine hanging around unused in a closet.
Craftbuds put together a post on the very best sewing machines for beginners and all the things you need to consider. Overall, they recommend going with a tried and true brand like Singer, Brother, or Janone. Their top recommendation for a beginner’s machine is the Singer Stylist 7258. However, in my experience, Singers break pretty easily.
I have the Brother XM2701, and it’s been kickin’ for the last 2+ years. To me, this is the perfect beginner’s machine. It’s budget-friendly at just $130. And it has a good amount of features for beginner to intermediate level – just enough features to do what you need, but not too many where it gets confusing.
The Brother CS7000i machine is also a great option if you want to get a slightly upgraded machine, but still for under $230.
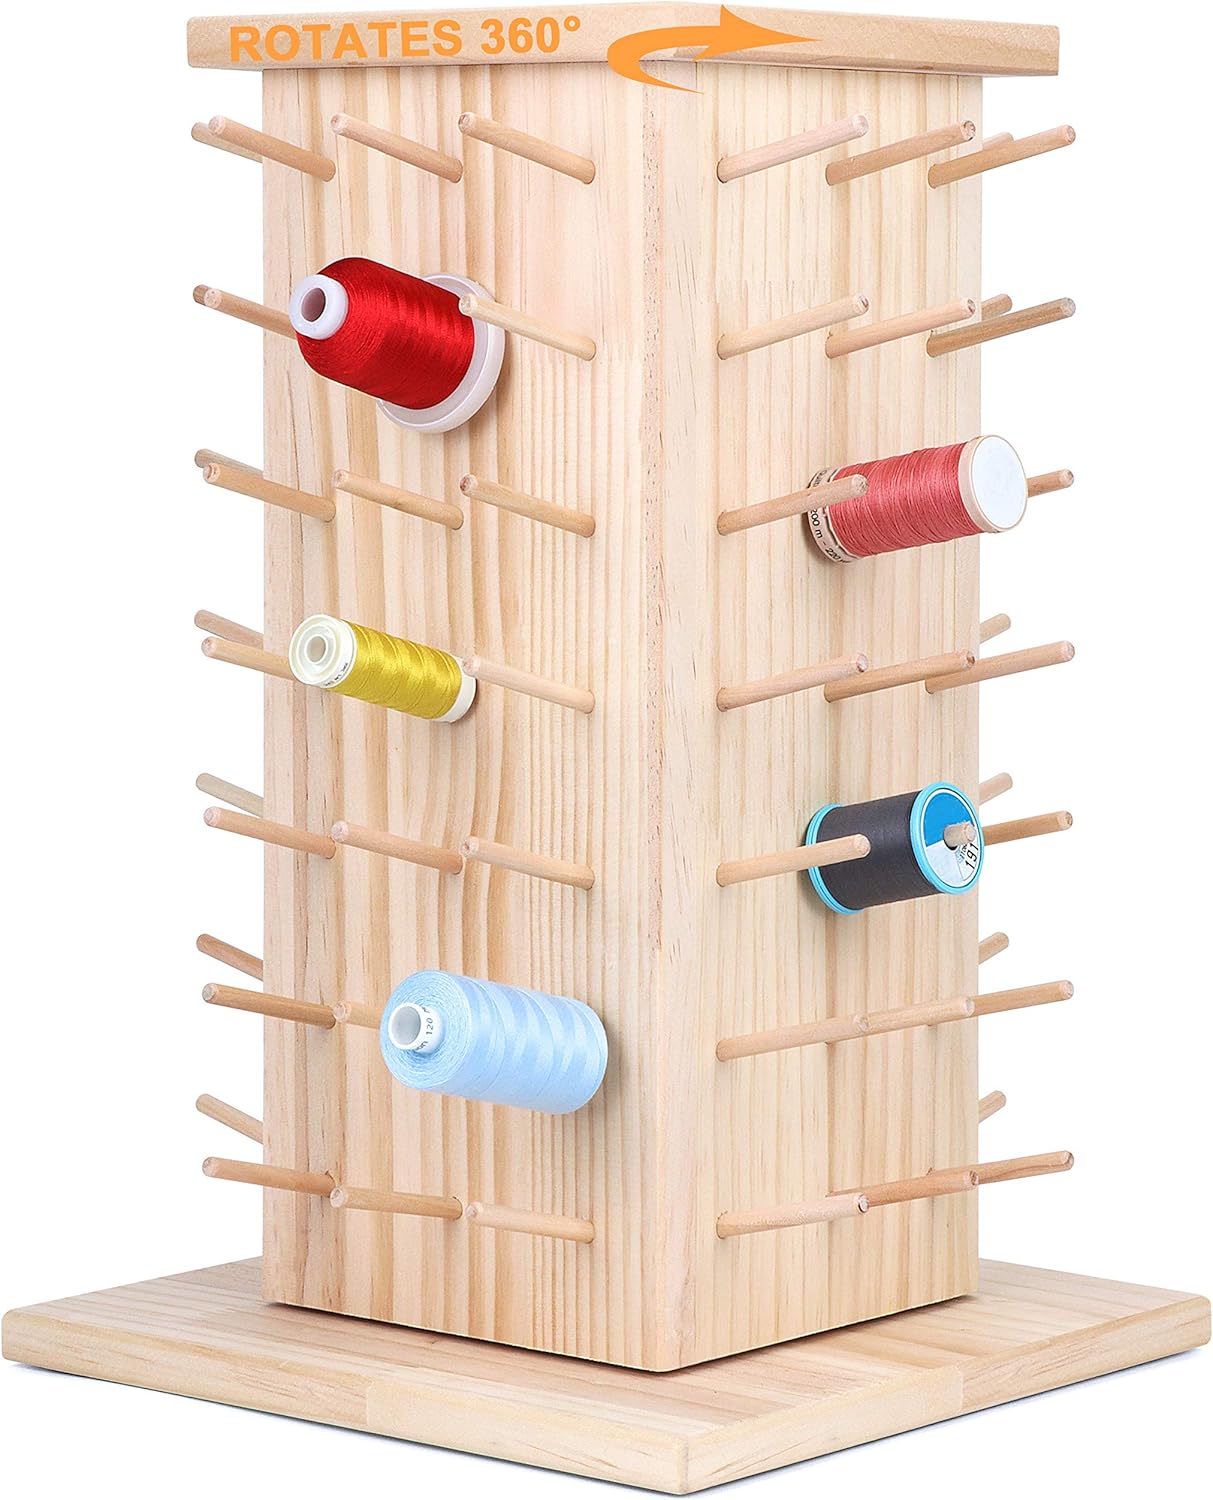
2. Thread + organizer
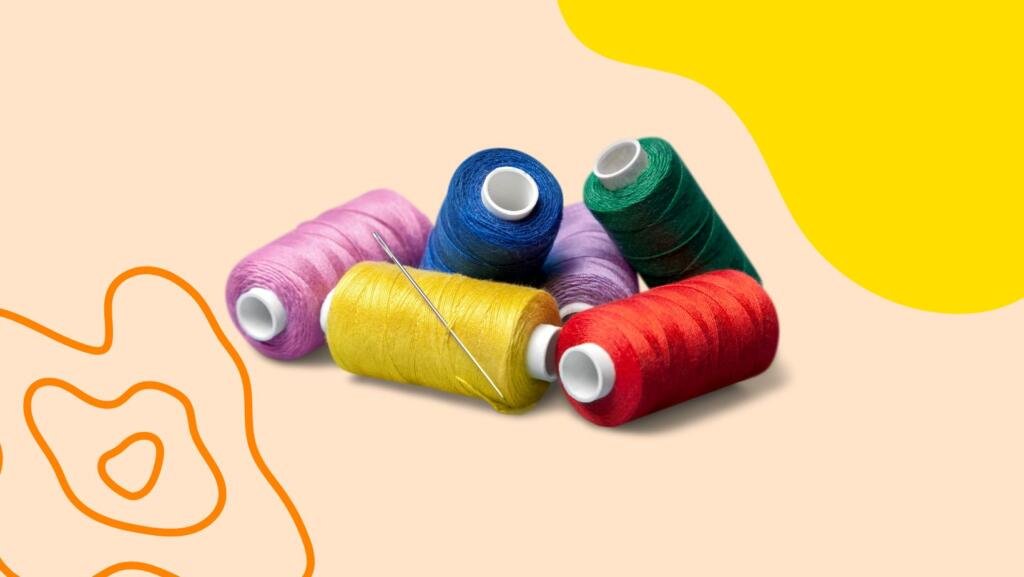
After your machine, thread is one of the most important supplies in your sewing starter kit. You may think that all thread is alike, but picking the right thread for your project is important.
When it comes to brands, Coats & Clark and Gütermann are always solid.
You can get a full thread guide from Sew Guide, but it might be a little bit of information overload for beginner’s purposes. So I’ll summarize all you’ll need to know about thread as a beginner sewer.
- If you’re using lightweight natural fiber fabric (like cotton and linen), you should use cotton thread. There is no stretch to this thread though, so avoid using it for any piece that may stretch and potentially snap this thread.
- If you’re using synthetic fabrics and blends (like polyester), use synthetic fiber thread.
- Corespun polyester threads are the strongest
- Monofilament polyester thread is great for stretchy pieces
- Spun polyester is cheap, but not that strong. So avoid using it with any projects that may put pressure on the seams
- Nylon thread is great for heavyweight fabrics and leather. This is not all-purpose, though. So make sure you only use it for heavy fabrics.
Thread number is another thing you may want to consider when selecting thread for your project. The lower the thread number, the thicker the fabric.
- 100 is the finest
- 50 is best for quilting and buttonholes
- 30 is best for thicker fabrics
You never want to go lower than 20 on your sewing machine as it can break it.
And of course, you’ll need some way to house all your thread. So although a cute thread organize isn’t a total necessity, it is for a clean and organized workspace.


3. Fabric scissors
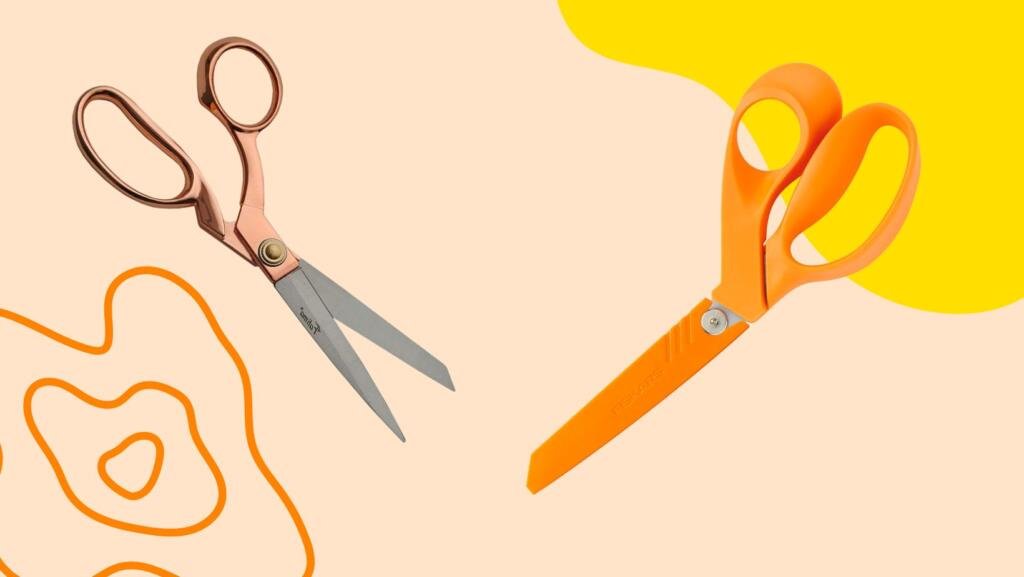
Cutting with precision is super important with fabric. And to do that, you’ll need some good scissors.
Any scissors that are made for fabric and other heavy-duty crafts is likely fine. But if you want to go with the best in the industry, that would be Fiskars.
Whichever brand you go with, though, make sure you designate them only for fabric. If you use these scissors for paper, hair, and other crafts, they will dull a lot faster. Keeping them dedicated to sewing will make sure they stay sharp and keep giving you a really neat cut.
Another pro tip: for the cleanest cut for your threads, use embroidery scissors.
4. Fabric chalk
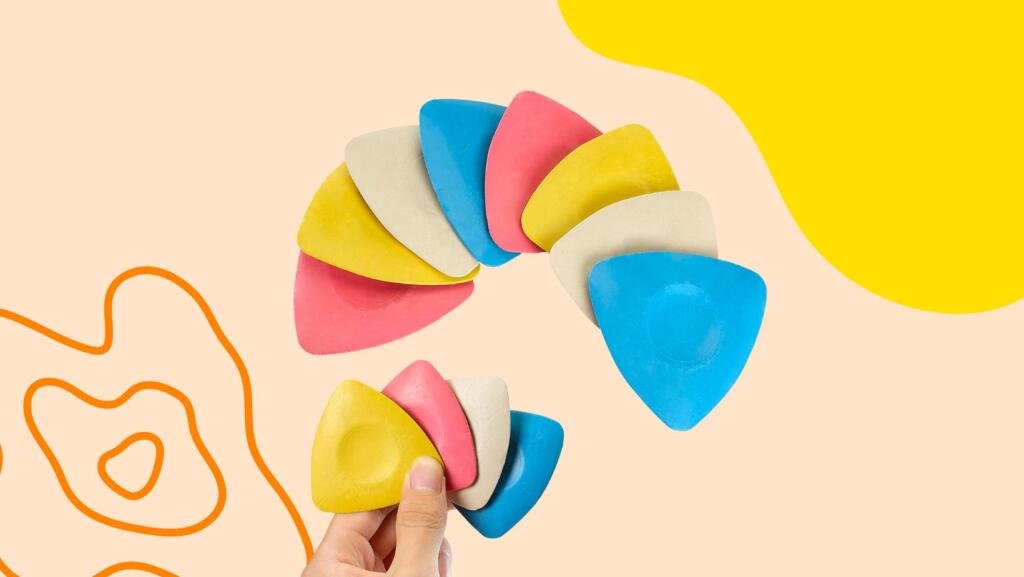
Don’t make the same mistake that I have made for longer than I’d care to admit. If you use marker to mark up your cuts on your fabric, don’t only will it potentially bleed stains into the visible part of your garment. But you can also end up with ink allllll over your hands.
Swap out the markers and pens for fabric chalk. This chalk allows you to make marks both on edges where you’ll cut as well as visible places on your fabric such as decorative stitches, pockets, etc.
Once you don’t need the markings anymore, you simply wipe it off.
So simple. I’m still kicking myself for not just spending the $5 earlier.
5. Measuring tape

You’ll definitely want to get a flexible measuring tape for your sewing starter kit. The flexibility is important; don’t use the rigid one that you use for construction projects. The bendiness will definitely be your friend when you’re trying to measure fabric.
I would suggest actually having a few of these on-hand. Keep one in whatever you use to organize sewing supplies, in your car, and in your bag. You never know when inspiration will hit, so it’s helpful to have this on you when you need to make some measurements.
6. Seam ripper
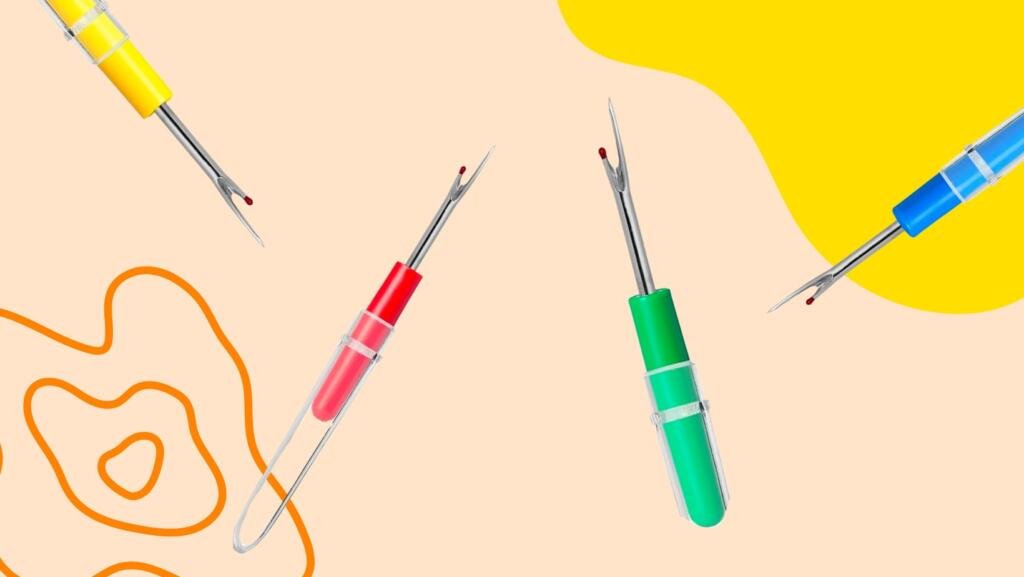
This will be a lifesaver. It’s especially helpful for me for upcycling clothes. If you have a piece that you want to rework into something else, you can use the seam ripper to separate the fabrics. You just glide the seam ripper down the seam, and it breaks them apart cleanly. This is much better than cutting pieces apart around the seam, especially if you don’t have a lot of fabric to spare.
A seam ripper is also a necessity for non-upcycling projects, too, though. If you make a mistake (and you will, we all do no matter how long we’ve been sewing), you don’t have to rip your fabric or try cutting the seams with scissors. This makes it really easy to backtrack your mistakes.
7. Lots of bobbins
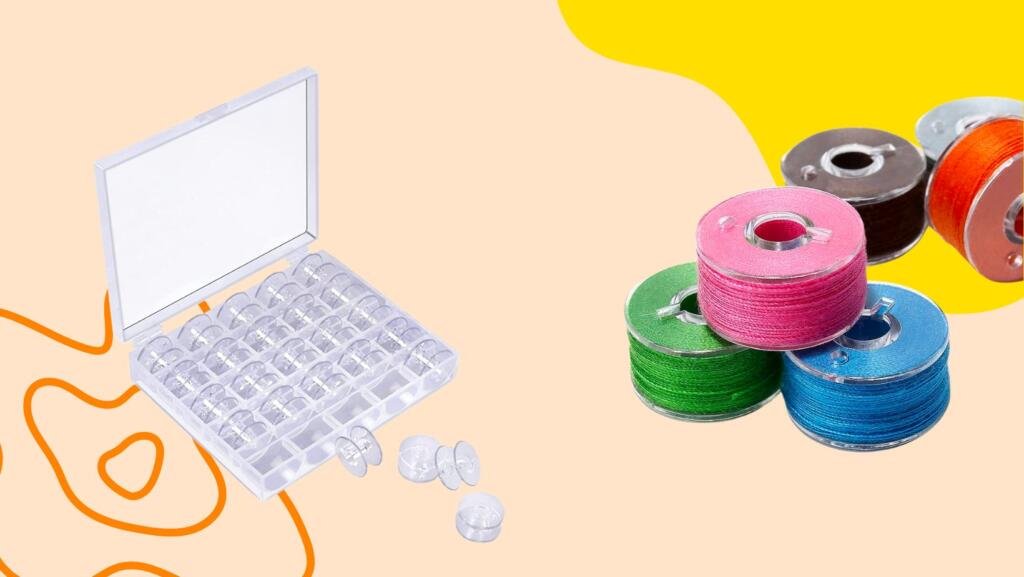
Your bobbin feeds the thread from the underside of the fabric. It’s also one of the biggest pains in the ass to have to re-wind mid-project. So you can really not have too many bobbins in your sewing starter kit.
I would recommend having some empty ones laying around so that you have a spare one whenever you get a new thread. But also keep a couple pre-wound bobbins in colors that you use a lot. For many people, that’s black, white, and brown. But if you sew with orange thread a lot, for example, have a couple orange bobbins ready to go at all times.
And for big projects, I would recommend winding up an extra bobbin to have on-hand before starting. It’s truly so frustrating to be on a roll with a piece, and then your bobbin runs out. You have to de-thread the machine, set up the bobbin, wind the bobbin, and then thread your machine again. A total buzz killer. So just set yourself up for success before so you can just swap out the empty one for the ready-to-go one when you need it.
You can get tons of bobbins online for really cheap. There are pre-wound ones that have a variety of colors, as well as empty ones that you can fill with your own thread. And they usually come with a case to hold them, which is convenient!
8. Needles
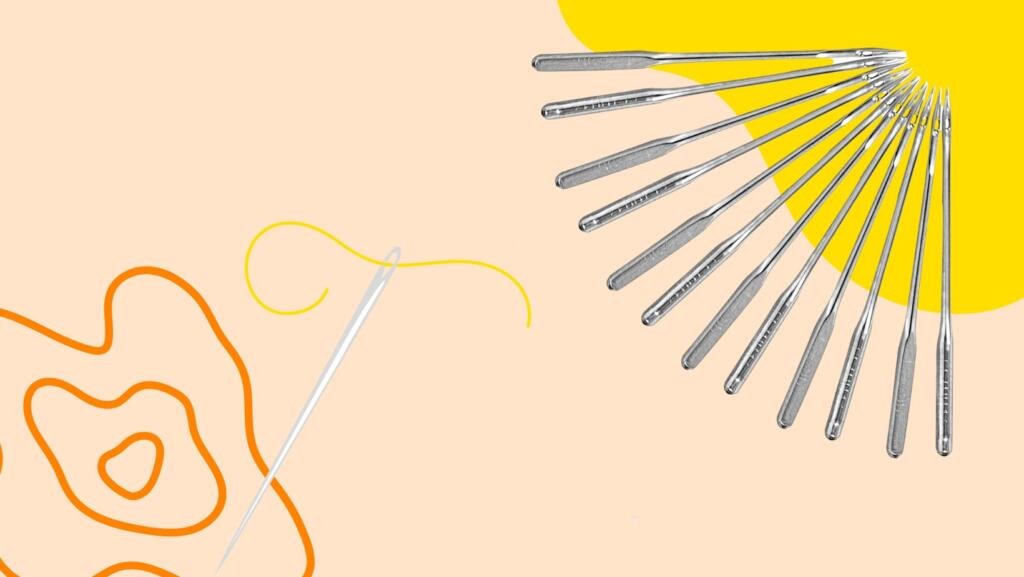
Your sewing machine will come with a needle, but you want to make sure you have some spare Universal needles on hand, too. Although it doesn’t happen often, needles can snap. And it’s much more convenient to have one on hand to swap it out rather than having to run to the store of place an order on Amazon and wait.
Some machines may come with spares, but just double check.
You’ll also want to have some needles for hand sewing. Likely you’ll need to hand sew something every once in a while, whether it’s buttons, finishing off edges, etc. Even a little $1 sewing kit from the Dollar Tree or the gas station will be more than enough.
9. Pins + holder
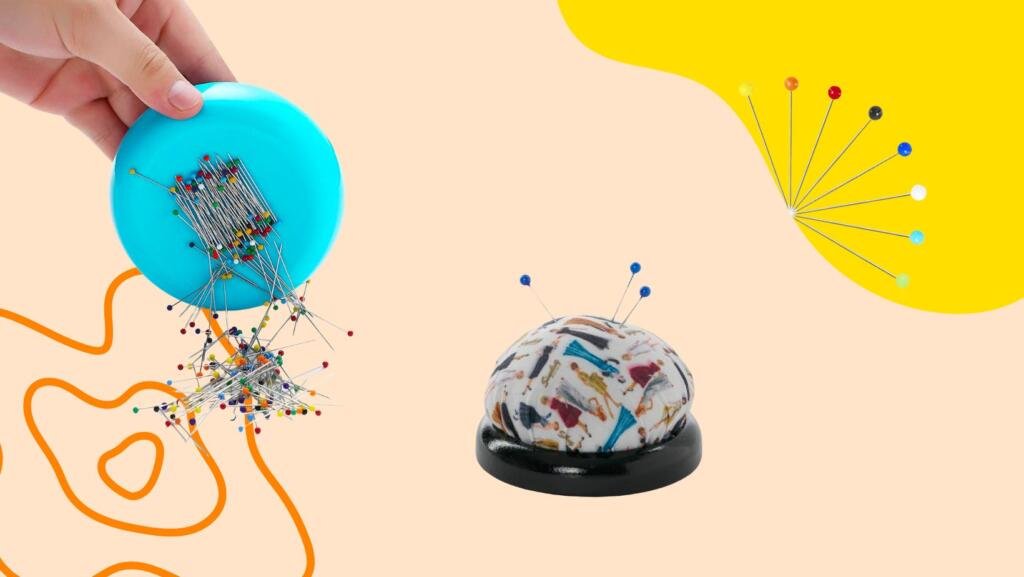
You will probably use tons of pins in every single project you do. You’ll use them to hold down hems, clamp edges together, and even gather fabric once you’re more advanced. So grab a lot of them to build out your sewing starter kit.
I prefer the ones with the balls at the end that are about 1.5″ long. They’re the easiest to grab and to work through fabric.
But these little guys end up everywhere, so definitely make sure you have something to hold them all. I like a classic pin cushion for long-term storage – you’re less likely to prick your finger since they’re all burrowed in the felt.
But I find that it’s easier to work with a magnetic tray in the middle of a project. It’s not that convenient to constantly stick ins back in the cushion when you remove them, especially if you’re grabbing and returning them constantly. So I usually transition to a magnetic tray to collect all the pins I remove as I’m sewing, and I’ll reuse them for the next step in the process before grabbing for some more from the pin cushion.
10. Seam gauge
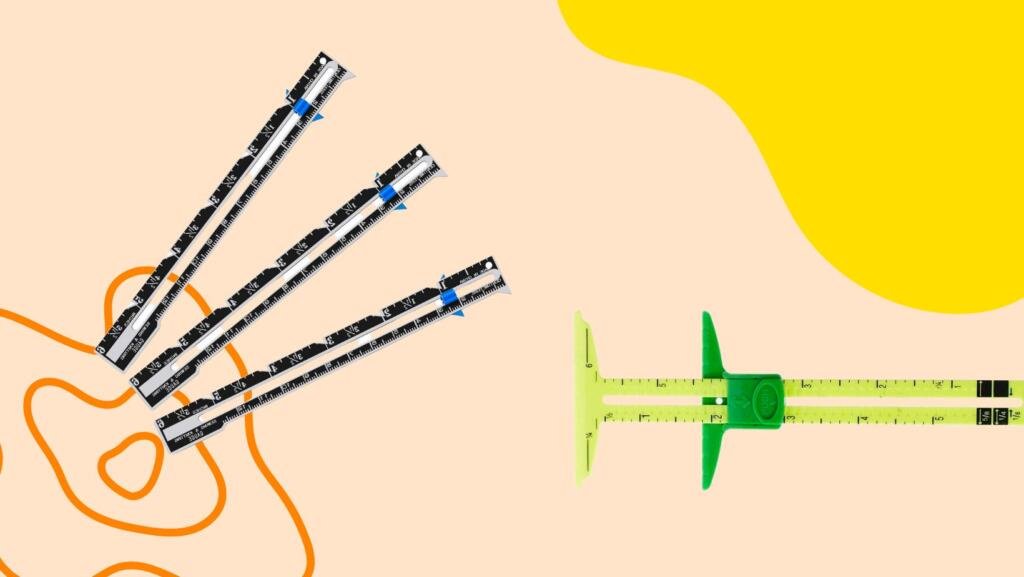
Getting an even hem is one of the hardest parts about sewing for me. I wouldn’t say this is necessarily one of the first things to add to your sewing starter kit as you’re still getting the hang of sewing. But once you’re ready to give your pieces a more polished look, you need this.
A seam gauge can help you mark out exactly where you need to fold and sew to get a really clean and consistent measure on your piece. This video explains how it works pretty concisely.
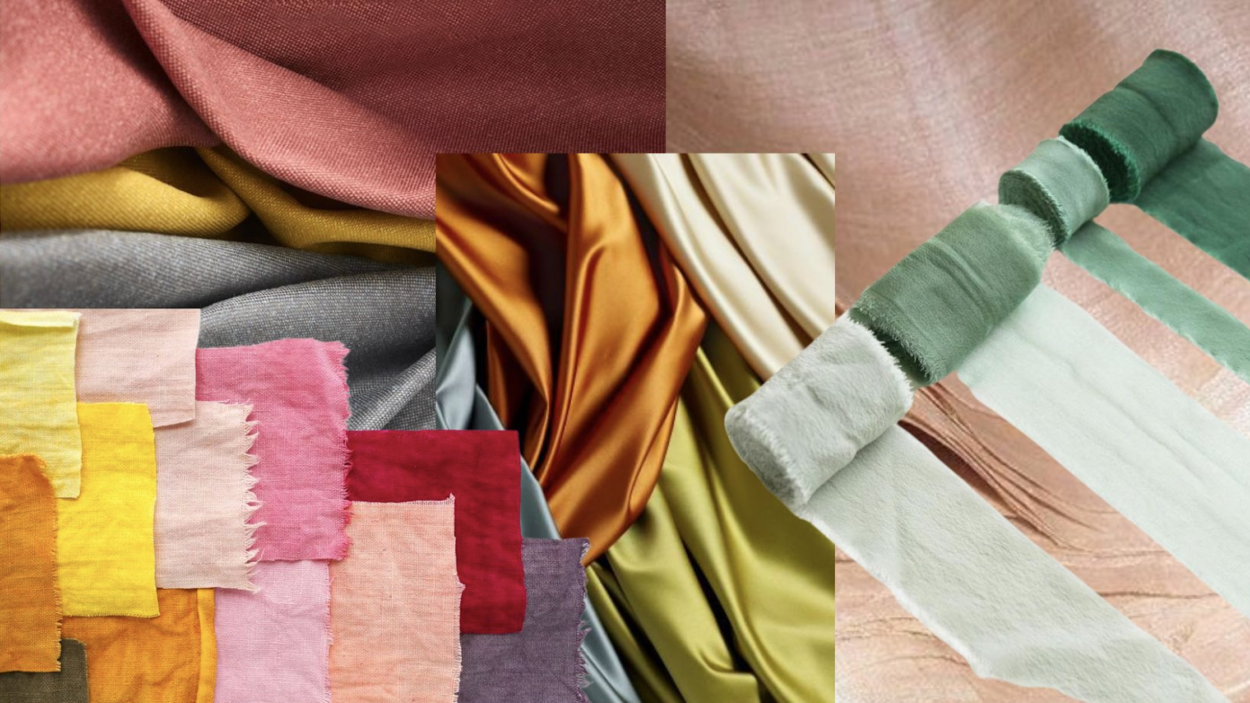
11. Spare fabric
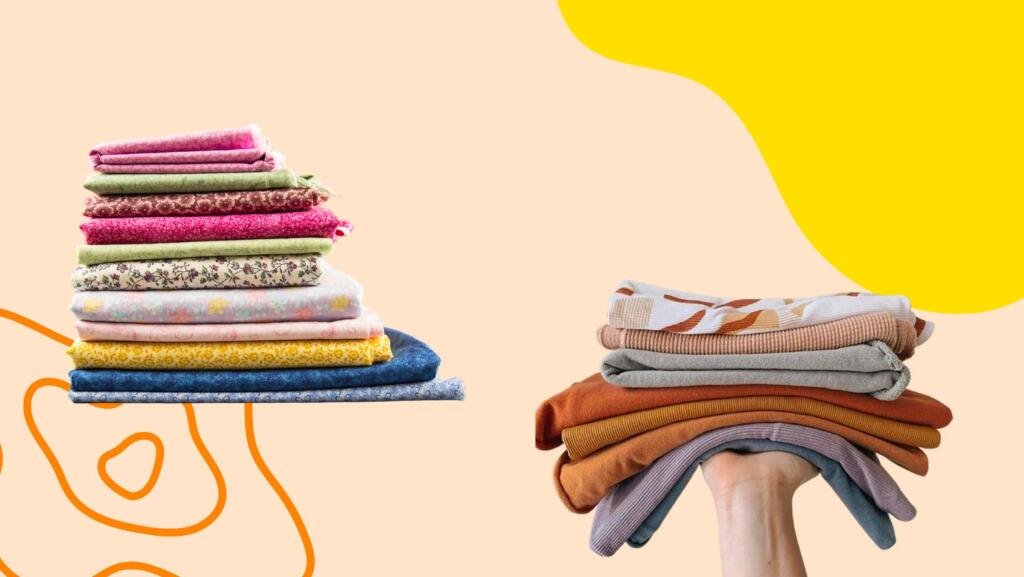
This is something I would recommend building up over time. Whenever you see something that you like, even if you don’t have a current project for it, go ahead and grab it.
You can get this fabric from a few places:
- Thrift stores – look in their fabrics + blankets section, as well as the clothing. A lot of times I’ll find a shirt in a great back but a shape or style I don’t like. And I’ll grab it just to rip it apart and rework it.
- In your own closet – If you love a good purge like me, you’re likely clearing a lot of stuff out of your closet on a regular basis to donate. But see if there are any pieces that can be given some new life – either by taking it in or turning the fabric into something else completely.
- Look for wholesale fabric stores in your area – Once I found out about the one in my area, it was OVER for Jo Ann fabrics. If you’re in the Atlanta area, definitely check out Fine Fabrics in Norcross for really high quality fabrics that average around $5-6/yard.
If you’re not in the Atlanta area, just do a Google search for fabric stores near you. - Online fabric marketplaces – Prefer to do your shopping online? Places like Online Fabric Store have a massive variety of fabrics available for ridiculously cheap prices. I’m talking like $3-5/yard or less! If you’re comfortable buying some fabric without feeling it in your hands first (for example, with a kind of fabric you’re really familiar with), definitely check here first.
12. Iron + ironing board
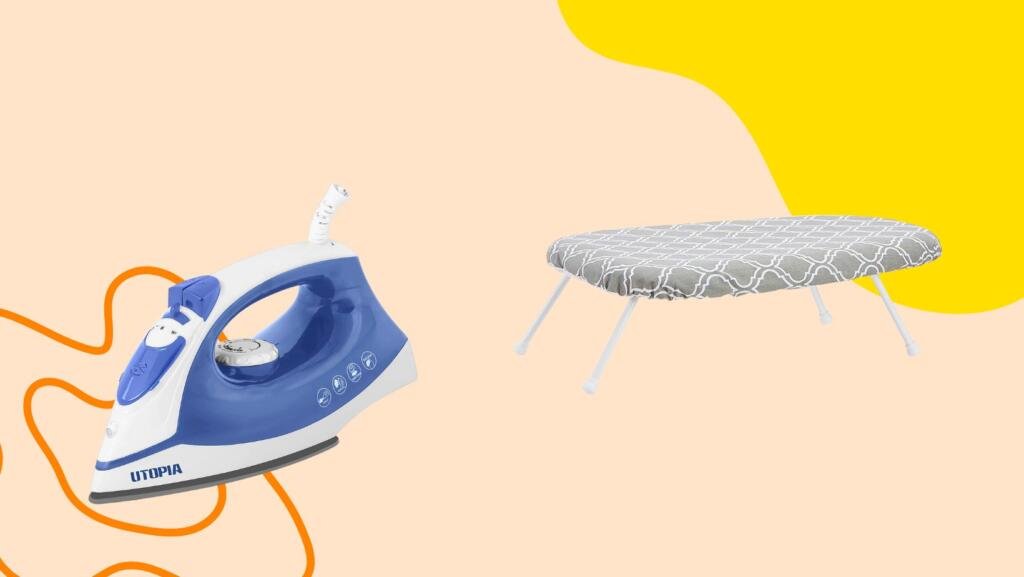
You likely already have one of these laying around for laundry purposes, but it will come in handy for sewing, too!
Ironing out any fold lines before sewing can give you a really smooth surface to work with when cutting. But an iron can also help you press hems into place to make sewing them down so much easier.
And an iron will also follow you into more advanced sewing projects, such as when you need to add iron-on interfacing to your fabric to give it some integrity.
You can really use any iron, but if you’re buying one new, it’s best to go with a steam iron. As for the ironing board, you can get by with just putting a towel or blanket over your workspace. But an ironing board does give you a little extra flexibility and ease of use.
Little tabletop ironing boards are super convenient!
13. Miscellaneous accessories
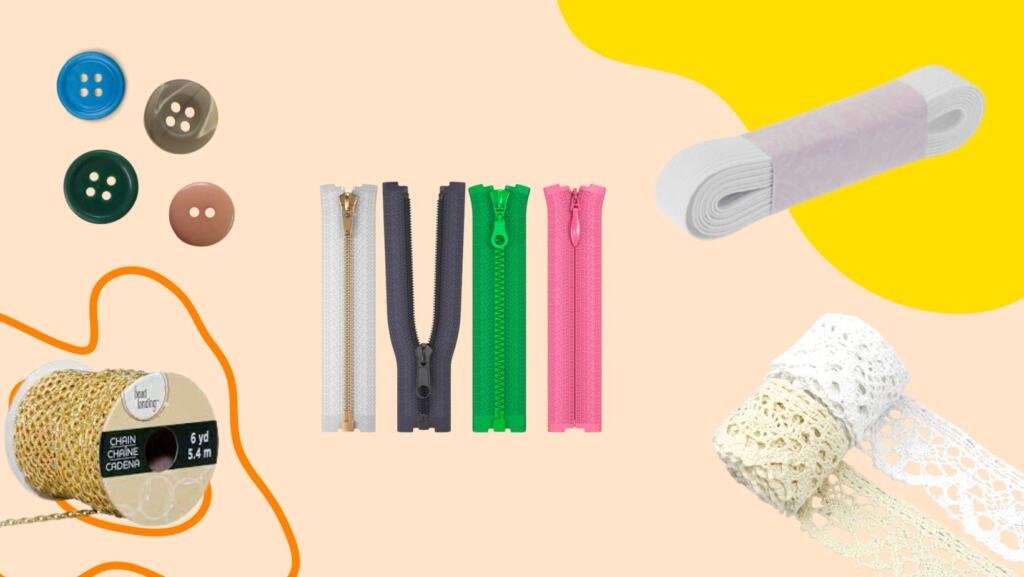
As you continue your sewing journey, you’re gonna discover so many fun new projects you want to do. And they may require some specialty supplies.
By no means do you need to rush to get these items, but here are just a few ideas of pieces you may want to grab for your sewing starter kit as you see them and as budget allows. If you already have some of these fun supplies in your inventory, you’ll be ready to go when inspiration hits!
- Zippers of various lengths, styes, and colors
- Elastic
- Buttons
- Spools of chain
- Lace lining
- Beading
How to start sewing
So, you’ve got all your supplies ready to go in your sewing starter kit. Now what?
If you want to start sewing here are some first steps you can take to learn and actually create your first few pieces and get comfortable with your machine.
Online tutorials
There are tutorials online for almost anything you need to learn. So take advantage of them to get to know your machine and understand what all the sewing lingo is about.
If you bought a new machine, it likely came with some tutorial material. Sometimes these are on DVDs – but like, who has a DVD player anymore, so you can access most online.
Other than that, I would highly recommend checking out some YouTube videos for lots of tutorials on literally any facet of sewing you can think of.
Coolirpa has a great channel for this. She has a walkthrough video showing you everything you need to know about using your machine. Another helpful video to check out is her tips on mistakes that beginners make and how to avoid them.
Make something simple
Starting out trying to make complicated garments will naturally lead to frustration and possibly losing interest. So pace yourself and try something simple to get started and master the basics.
When I first started sewing when I was younger, I made a million skirts. They’re a simple silhouette with simple stitches, but you can also get the opportunity to experiment with more advanced techniques like an elastic waistband once you get more comfortable.
Some other easy pieces that I would recommend starting with are tote bags, placemats, pillowcases, or shift dresses.
Rework an old piece
Another great place to start sewing is by reimagining an old piece of clothing. This could be something in your closet that you don’t wear anymore or something you found at the thrift store.
A really simple first project for this is turning a full-length shirt into a crop top, turning a dress into a 2-piece set, or combining two halves of shirts to make a cool split-design top.
If you want some serious inspiration for thrift flips, you’ll definitely need to check out Hippie Hued on Tiktok. You can thank me later.
@hippiehued Nowwww THIS #thriftflip #upcycling #sewing ♬ Tom’s Diner – AnnenMayKantereit & Giant Rooks
Use your first pattern
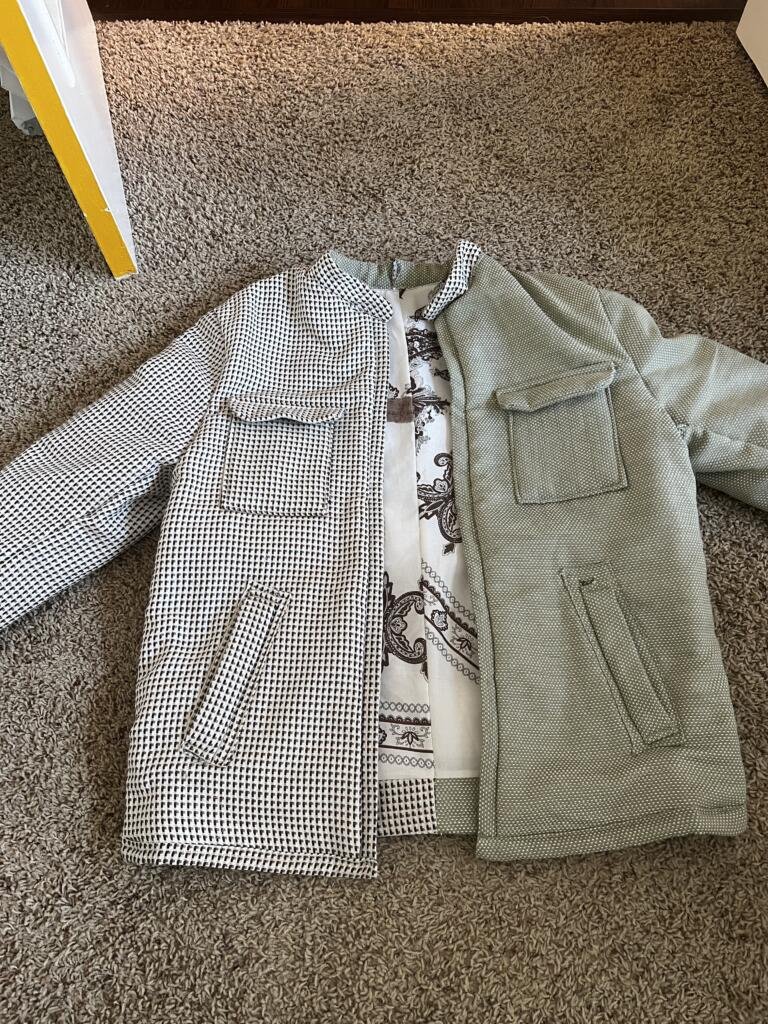
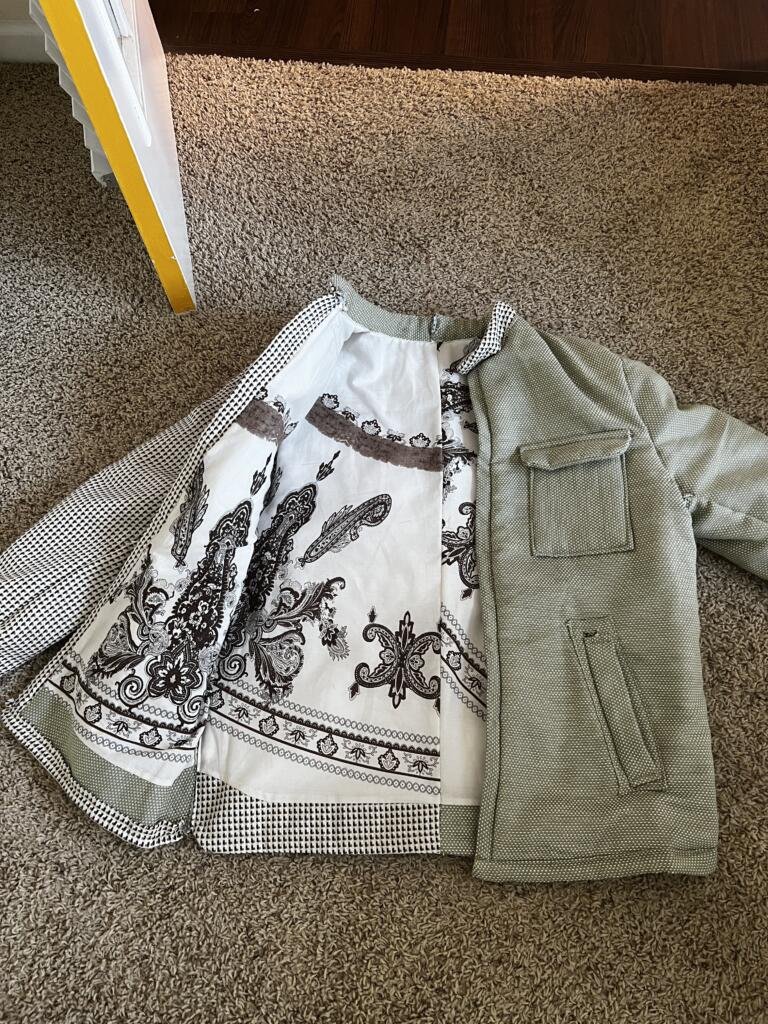
It took me a while to come around to the idea of using a pattern. I usually just eyeballed and guessed everything. And sometimes, that is the best route to go to create something really unique. But I will say, I wish I would’ve used patterns when I first started out.
Although on the surface, patterns may seem a little complicated, they tell you exactly what you need to do and exactly what size pieces you need to make your piece. So that can save you the frustration of realizing you didn’t buy or cut enough fabric.
And if you buy you pattern from somewhere like Etsy, they usually come with tutorials that walk you through exactly what you need to do. So it’s almost like a lesson on some aspects of sewing you may not know about, too, like certain stitches, terminology, etc.
The thing about patterns is that they really help you to create a clean finish to your garments. When I wing it, things look good, but they may not have the neatest insides. When you use a pattern – even though it may be more complicated – you’ll end up with a really finished looking piece.
The jacket below, I made using this pattern. I would not recommend this for a beginner, because even as an intermediate sewer I literally wanted to break my sewing machine at least 5 times. But I can definitely say I learned a lot and was obsessed with the end product. (I think I also made it more complicated by making it two-tone, but you know, I had to customize it a lil)
Top tips for getting started sewing
So now you know all the supplies you need for your sewing starter kit and you know the first steps you should take to start sewing, now time for some advice from me to you.
These are good tips to keep in mind as you start sewing and beyond. And they’re things I wish someone would’ve told me when I started sewing.
- Always get more fabric than you need. And I mean always. Sometimes fabric isn’t as stretchy as you thought. You may make mistakes. You may have mis-measured something at the beginning. Or maybe you decide you want to alter your design a little bit in a way that requires more fabric. Rather than having to go back to the store to buy more, just grab a little extra from the beginning.
For most pieces, I would recommend at least an extra half a yard if you’re using a pattern. And if you’re winging it, get at least an extra yard since you’re more prone to mistakes than if you’re using a pattern.
And if you really like the fabric, just go ahead and grab a couple extra yards right away so you’ll have it on hand both to accommodate for mistakes and for scrap fabric for future projects. - Be patient. Sewing can be frustrating as hellllll. But the end result is so worth it. There’s truly no better feeling than when you get complimented on an outfit and you can say “thanks, I made it.” But without patience, you’re gonna have a hard time getting there.
Be comfortable with the fact that you’re going to make mistakes. Anticipate the fact that you may get halfway through a piece and realize you’re sewing one piece on inside out. Of course, try to minimize mistakes by thoroughly checking and re-checking things before making a stitch, but some things are bound to happen. I find that when you go into a project knowing that something frustrating is going to happen, you get less discouraged when it does.
Part of patience is also being willing to step away every once in a while when you’re sewing. Whether that’s for an hour or a couple days. You don’t want to force yourself to keep sewing when you’re in a frustrated and negative headspace – you’ll get burnt out. - Start taking inspiration pictures everywhere. Once you’re prepped with your sewing starter kit, your motivation is going to go through the roof. You’re going to be looking for inspiration everywhere, and you’re going to find it.
Whenever you see a really cool piece that you’d love to make, take a picture and file it away in a folder on your phone or in a notion board. When you compile these all together, you always have a place to look for ideas when you have the itch to start sewing something.
One of the best things about sewing honestly is the self sufficiency and how much money that saves you. Whenever I go to the store or shop online and see something cute, my first thought is usually, “oh I can make that.” And a good portion of the times, I actually can!
@homeyhomies i stg my bank account would be screaming if I bought a new outfit every time I wanted one
♬ Love You So – The King Khan & BBQ Show
Sewing inspiration to get you motivated
As my last little treat to you in this sewing starter kit, I want to give you some bonus inspiration and tutorials.
Check out these YouTube tutorials below if you want somewhere to start your sewing journey.
- How to turn your clothes into patterns – coolirpa
- 4 easy sewing projects for beginners – coolirpa (I told you she had some great content on her channel!)
- Sew a pillow 2 ways – MADE Everyday
- How to make a linen and ruffle throw blanket – Farmhouse on Boone
About me
Hey my name’s Hannah Michelle Lambert, the voice behind homey homies. I’m an LA-based designer, writer, and content strategist. I’m passionate about the intersection of productivity and creativity. I love talking about creative habits, technology, processes, and everything in between that helps me blend the Type A and Type B parts of my brain.
Note: This post may contain affiliate links, so I may make a small commission if you make a purchase. But this does not increase the cost to you at all – it comes out of the seller’s pockets.


Leave a Comment