

As a fully remote worker (who know lives with someone else who works fully remote), getting the perfect desk was a huge priority for me. Not only do I work from home, but I also do a lot of things from home. I have my personal desktop computer, my work laptop, my iPad, occasionally my sewing machine, and of course a remote worker’s necessity: a space to put your water/coffee/snacks. Add to this my boyfriend’s monitor/3 computer setup. So we needed a huge workspace. Luckily, we are using the larger room in our new apartment for the office, so we had lots of space to work with. Unfortunately, we had some trouble finding a massive desk that was affordable and also looked nice. So the natural solution: a DIY L-shaped desk.
DIY-ing the desk allowed us to take full advantage of all the space in the office. We could custom-fit it to the corner that we set aside for our workspaces.
And the best part: we made it for under $150!
I have a disclaimer, though. This is the laziest, most winging-it DIY you’ll ever find. But we’ve been using the desk every day for over a month now, and no collapses or unsteadiness. And I can tell you all the mistakes that I made so you don’t have to. (That’s a common theme in all of my DIYs, honestly).
How to make your own custom, DIY L-shaped desk for your home office
Admittedly, I focused more on getting video content for tiktok during this process 😬. So feel free to look at the video below. But in terms of process pictures/instructions, enjoy my beautiful doodles.
The supplies you need
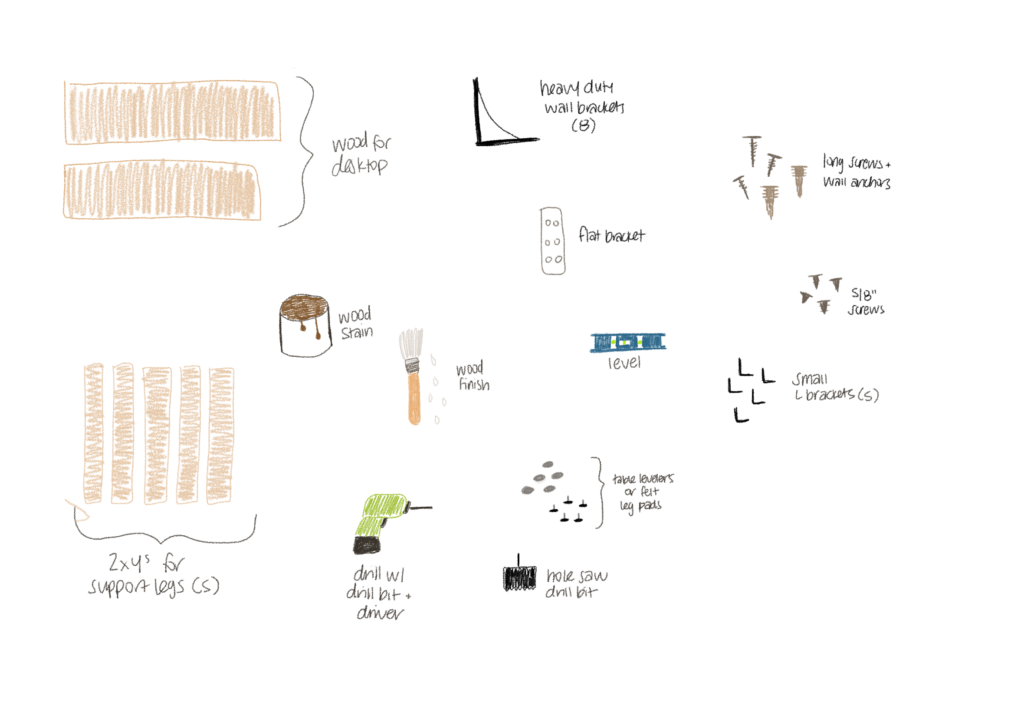
Options for all products are linked for your convenience:
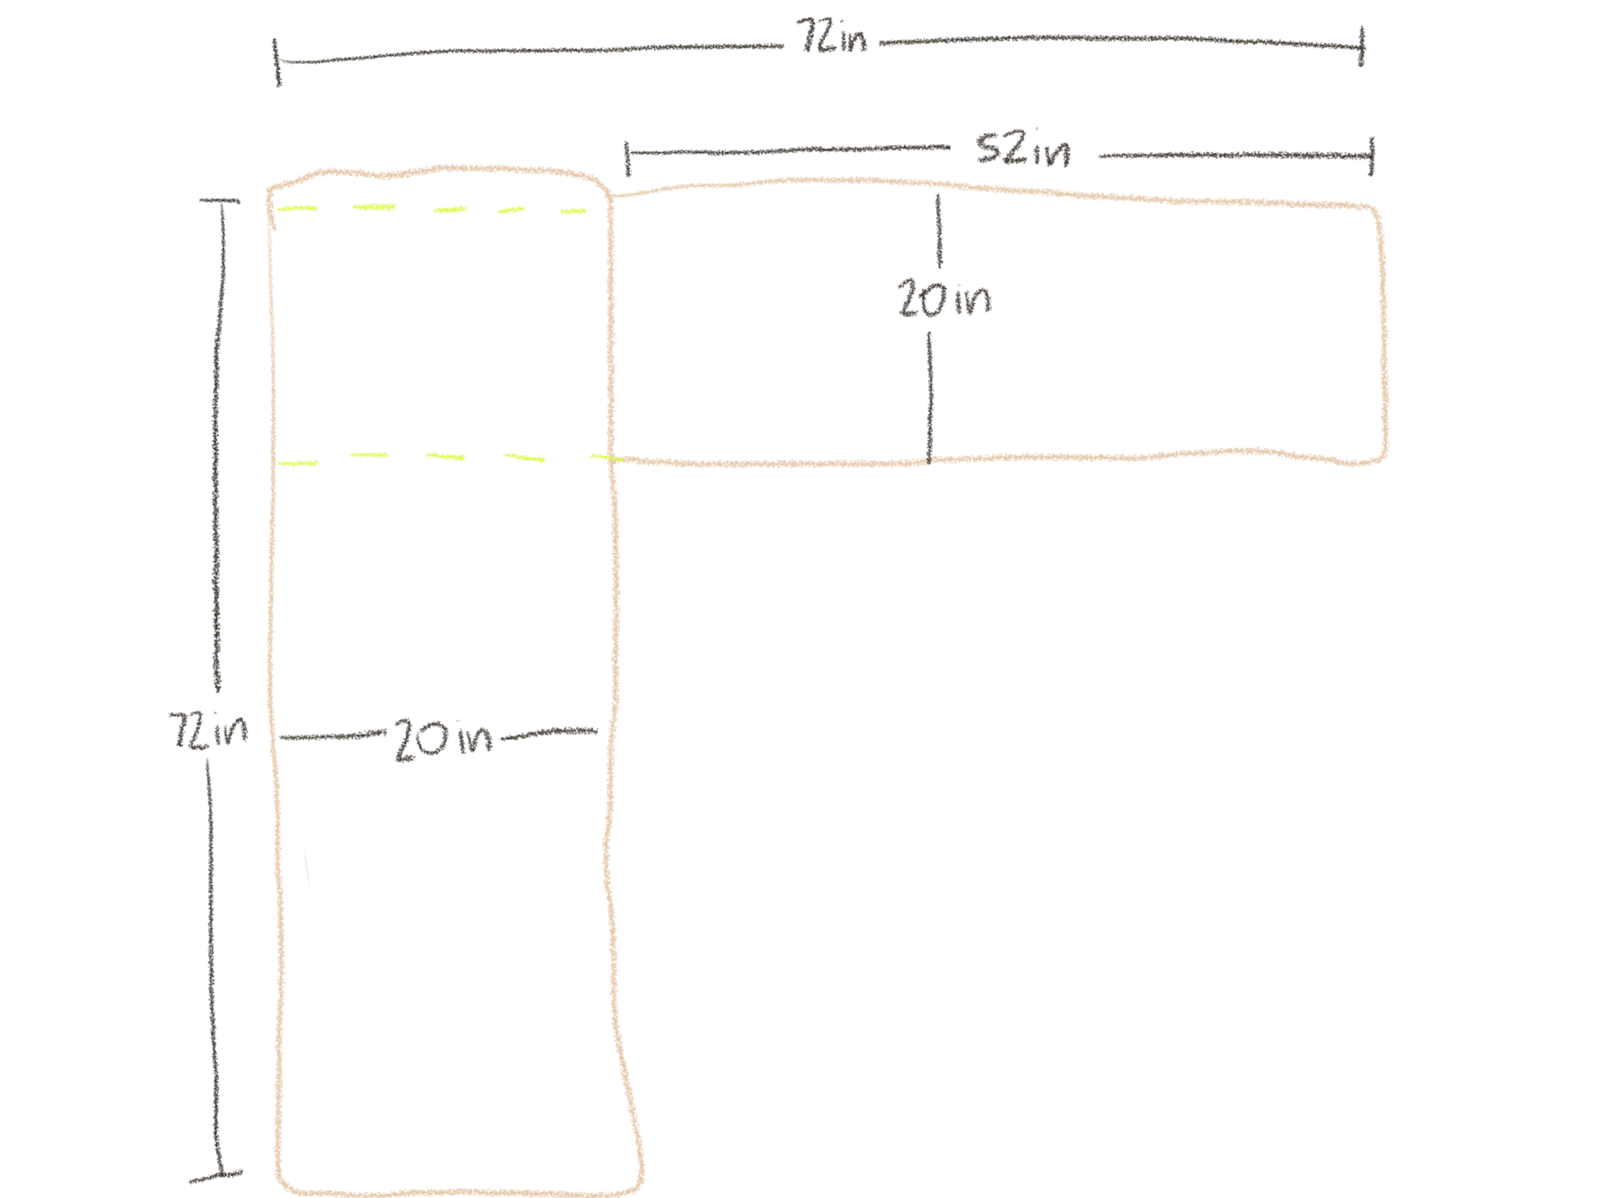
- 2 planks of 20″ wide wood, unfinished. 72″ and 52″ long.
- This was the right size for my space since I had about 7 feet to work with on each wall and wanted about a foot of free space. Measure out your space to see what’s best for you.
- There is a 20-inch difference between the lengths of wood to account for the overlap (pictured below), but both sides will end up being the same length of workspace.
- I did 20 inches for the depth and it works okay, but if I were to do it again, I would probably do closer to 24 inches to give me a little bit of a deeper workspace for projects like drawing and sewing. If you will just use this as a simple computer desk or writing desk (or if your space is really limited) 20 inches should be sufficient.
- 8 wall brackets. Heavy duty.
- 1 flat bracket to secure the two pieces of wood together.
- Tons of long screws with wall anchors (your wall brackets will likely come with these, but double check).
- Several shorter screws that are shorter than the width of your wood desktop. 5/8″ length should work for most desktops.
- Wood stain in the color of your choice (optional if you like the color of the raw wood)
- Wood finish, clear Satin
- Level
- Drill with drill bit and drivers – this is the one I have
- Hole saw drill bit to drill a hole for cords to feed through
Optional: If you will be setting heavy, fragile equipment on your desk and would like additional support. Disregard if you would like the desk to be floating.
- 5- 28-30″ 2×4’s for the additional support legs. Length determined by how tall you want your desk to be. Would recommend 28″ for shorter people, 30″ for taller people. Home Depot/Lowe’s can cut the wood to size for you after you buy it.
- 5 small L brackets to attach support legs to the desktop.
- Felt leg pads or table leg levelers to account for any leniency in the table leg measurements.
Step one: Measure out your space to evenly distribute brackets
Measure out the total space that your desktop will span, and mark even distributions for your brackets. But don’t be a dumbass like me. I didn’t account for where the L brackets of the support legs would be, so I had to shift the desktop down about half an inch, leaving a gap.
The easiest way to avoid this is to simply exclude the amount of space your L brackets take up on the end. Take a look below at a good distribution for the brackets.

Step two: Use a level to mark where to hang each bracket
First, choose the desired height of your desk. I choose 28″ and that’s comfortable for me. But if you’re a bit taller, you may want to go closer to 30″.
At each evenly spaced increment that you marked for your brackets, mark the cross-section with your desired desk height. This will get you pretty close, but it’s smart to use a level to make sure that you’re getting it exactly right.
The way that I did this was to use something that’s relatively long and sturdy (I used a computer keyboard box) and lined it up between each mark. Get it exactly level and make a small, solid mark that you will use as your drill guides.

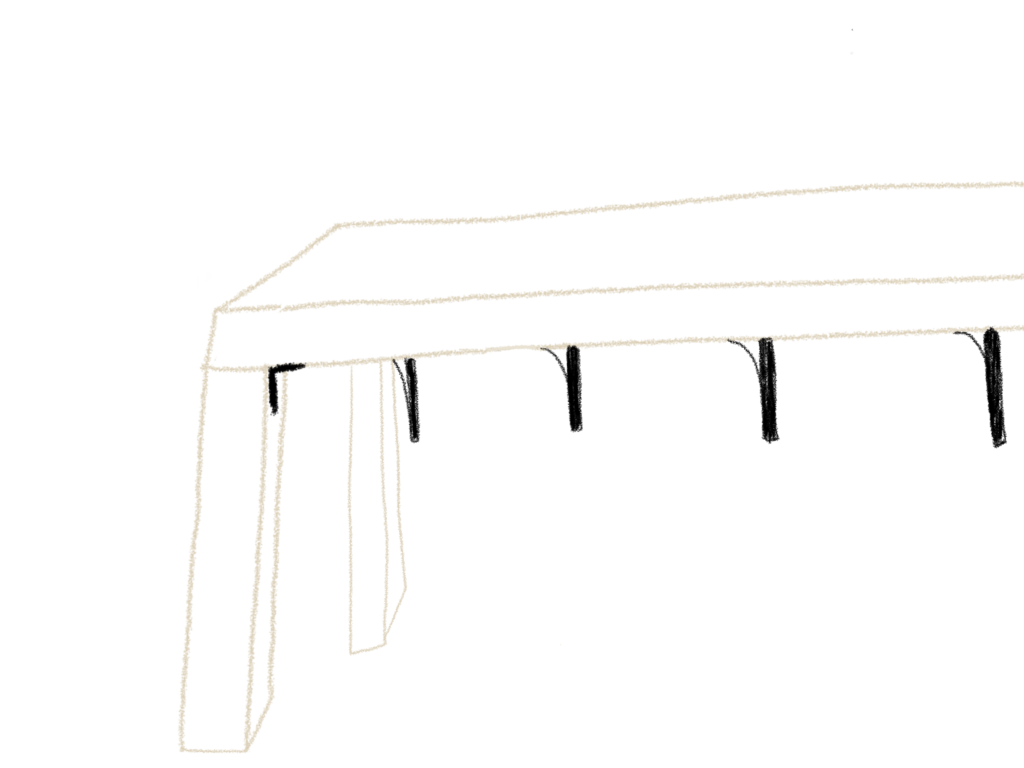
Step three: Hang your brackets on the wall using anchors
If you have a stud finder and are able to identify where the studs in the wall are, great. Otherwise you can just drill into the wall and see if you hit a stud. If you do, anchors are not necessary in those places and you can go ahead and just use a long screw.
However, since we’ll be using a total of 8 brackets, the majority of your brackets will not have a stud to adhere to. And that’s where drywall anchors come in handy!
If you’ve never used a wall anchor before, they’re little plastic guys that basically expand in your drywall once you drill a screw into it. This grips onto the material and makes sure that it won’t get pulled out of a wall. So this is what’s gonna give your desktop lots of stability.
Check out the video below for a tutorial on how to use them:
Important tip: When installing your brackets onto the wall, make sure you’re attaching the longer side to the wall, not the desktop (if the sides are uneven). This creates more stability.
Another tip: Line up your drill exactly where you marked when using the level. This ensures a really even desktop.
Step four: Mount your two desktops to the brackets
Line up your two separate desktops on top of the brackets. Now you’ll get a good vision of what your final DIY L-shaped desk will look like! But we still have a few steps to go, so bear with me.
If you have someone else who can help you, get them to hold it steady on top of the brackets so it doesn’t shift when you start drilling from the bottom.
One very important thing to remember here: make sure you use your short (5/8″) screws when drilling into your desktops! If you use screws that are longer than the wood is thick, you’ll have screws sticking through the top. Not only is this ugly, but it’s also dangerous.
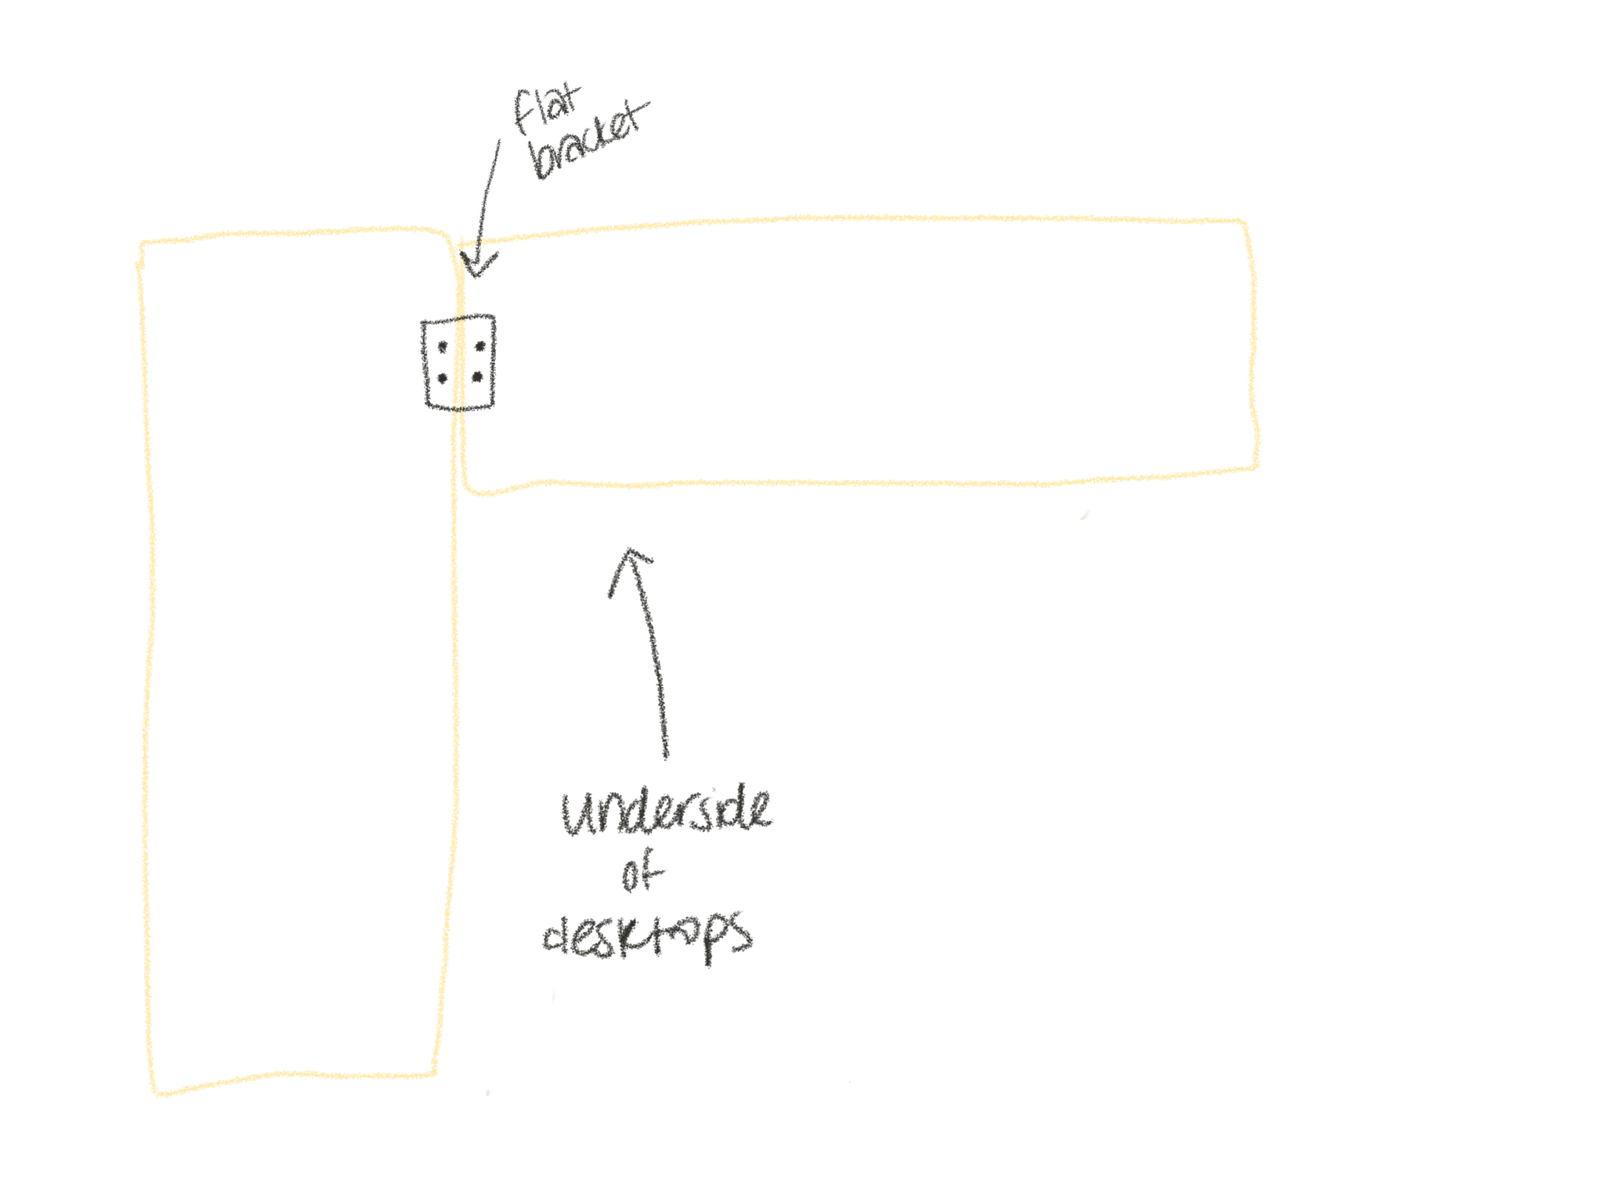
Step five: Connect your two desktops with a flat bracket
The desktops are already pretty solid since they’re held in place by the wall brackets. But just to add some extra stability and security, use your flat bracket to join them together.
Again, make sure you’re using your short screws here so that you’re not busting through the top with the screw tips.
Feel free to skip steps 6-7 if you’re going with the floating desk option and opting out of the support legs.
Step six: Attach your support legs
Like I said, this step is optional. I likely would have been fine because each wall bracket says that it could hold 160 lbs, so that means together they can withstand a lot. Likely more weight than I will ever put on this desk. But since I was having some issues with anchors, I figured better safe than sorry, and I kind of like the way that the legs look.
So… up to you. But you’re probably fine if you want a sleek, floating look for your DIY L-shaped desk.
If you have a pocket hole drill bit and want to attempt to use that to install these legs, go for it. But I didn’t have that option and wasn’t about to buy more supplies for this. So I went with the L brackets.
To install them, line your 2×4’s that you’re using for the support beams up with the very corners of your desktop. (You could inset them if you want so that the desktops hang over a bit, but I like how clean this way looks). Hold them steady and line your L bracket up with the inside of the leg and the underside of your desktop. Drill them into place with the short screw into the desktop and the regular sized screw into the leg. Repeat on all 4 legs.
I added another one into the corner of the table, too. But looking back, I wouldn’t have. I think it’s steady enough without it and is kind of an eyesore, so you don’t have to do this.
If you really want to solidify this connection, you could add wood glue between the leg and the underside of the desktop. But since these legs are additional support and not meant to be super heavy weight bearing, I decided not to.
Step seven: Adjust height of legs is necessary
I decided to cut my legs just a few centimeters too short just in case. I figured it would be easier to build up the legs than it would be to whittle some away if any measurements were just slightly off.
This is where either your felt pads or adjustable table leg levelers come into play. If it’s just a teeny tiny gap between your legs and the floor, stick a felt pad or two in there. If you left a pretty substantial gap, you can use levelers and twist them to the right height to get a super precise fit.
Step eight: Apply your finish of choice
You may love the raw color of the wood. If so, you can go ahead and skip this step and you’re almost done with your DIY L-shaped desk.
But if you want to change the color, either a lot or just slightly, then you’ll want to apply a stain. I chose the antique pine color of this finish from Amazon. It was just a slightly warmer tone than the original color. But if you want to go for a rich, dark walnut, go for it.
Before starting to stain, make sure you clean your desktops and support legs of all debris.
Then use a clean rag or craft sponge to apply the stain. It’s important to NOT just dump the stain on first then spread it around. This can make it end up looking really splotchy and uneven. Instead, apply it to the sponge/rag first, and then wipe it on the wood in a smooth, uniform fashion.
Wait for the first coat to dry, then determine if you wanna build it up a little more with a second or third coat.
After a few hours, apply your finish to give it a really nice, smooth and stain-proof finish. For best results, wait 2 hours after initial coat and then apply a second coat. After 24 hours, it’s ready for normal use!
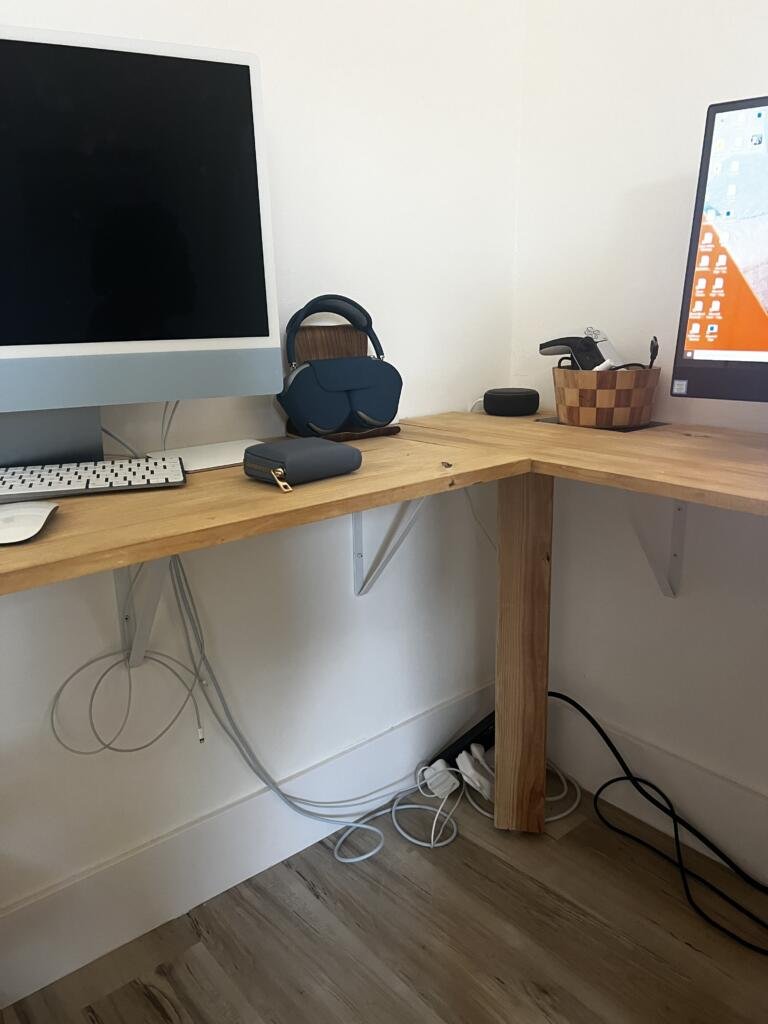
Step nine: drill holes for your cords
Putting some holes to feed your cords through will make your desk space a lot neater, so I highly recommend this step. And the great thing is you don’t even need tons of fancy tools like I assumed I would. I just bought a small hole saw drill attachment for under $10 and popped it on my drill.
I watched a tutorial to figure out exactly how to use it, but it was pretty simple. Just place it teeth down on the spot you want to drill a hole, apply a moderate amount of pressure (too much pressure and it won’t work) and let it get about halfway through. Repeat from the underside, and the cylinder should pop right out, leaving a really nice, smooth hole.
I decided to just place one on each side, but you can do more if you want.
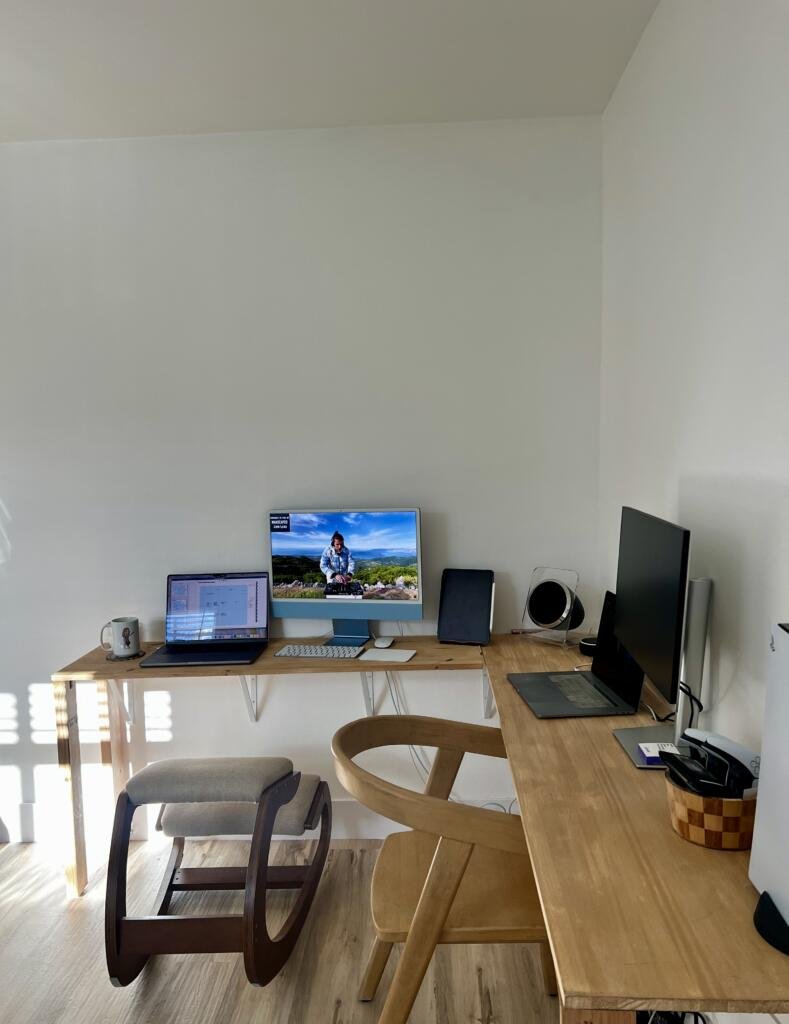
Step ten: style and enjoy
Now’s the fun part. You get to set up your workspace get to work! Have fun and feel free to brag that you made your own, custom DIY L-shaped desk. You’ll definitely get some, “what?? you made it yourself” ‘s.
Here’s what mine’s looking like so far! Still need to do a lot of styling. And I need to get that cord situation under control. But so far, so good!
If you end up making your own DIY L-shaped desk, tag me in your pic on Instagram @homeyhomies! I’d love to see!
About me
Hey my name’s Hannah Michelle Lambert, the voice behind homey homies. I’m an LA-based designer, writer, and content strategist. I’m passionate about the intersection of productivity and creativity. I love talking about creative habits, technology, processes, and everything in between that helps me blend the Type A and Type B parts of my brain.
Note: This post may contain affiliate links, so I may make a small commission if you make a purchase. But this does not increase the cost to you at all – it comes out of the seller’s pockets.


Leave a Comment